
In fashion, bespoke suits and couture dresses are the height of quality and luxury. Pieces that are meant to stand the test of time so they can be handed down as family heirlooms. In our industry, the equivalent is a drapery treatment that has been custom-designed and unique to your client’s home. At Helser Brothers, we pride ourselves on creating custom rods and hardware to go with our designer’s handcrafted creations.
To create such a complex and precise item, we cannot do it on measurements alone. This is where templates come in and where you, the client, have the most power and responsibility. For the ease of everyone involved, any templates sent to us must be as accurate and clear as possible. To achieve this, we ask that our clients use the following instructions when creating a custom rod template.
TERMINOLOGY
Before you start making your template and filling out your Custom Rod Order Form, you will want to note what kind of rod you want to make.
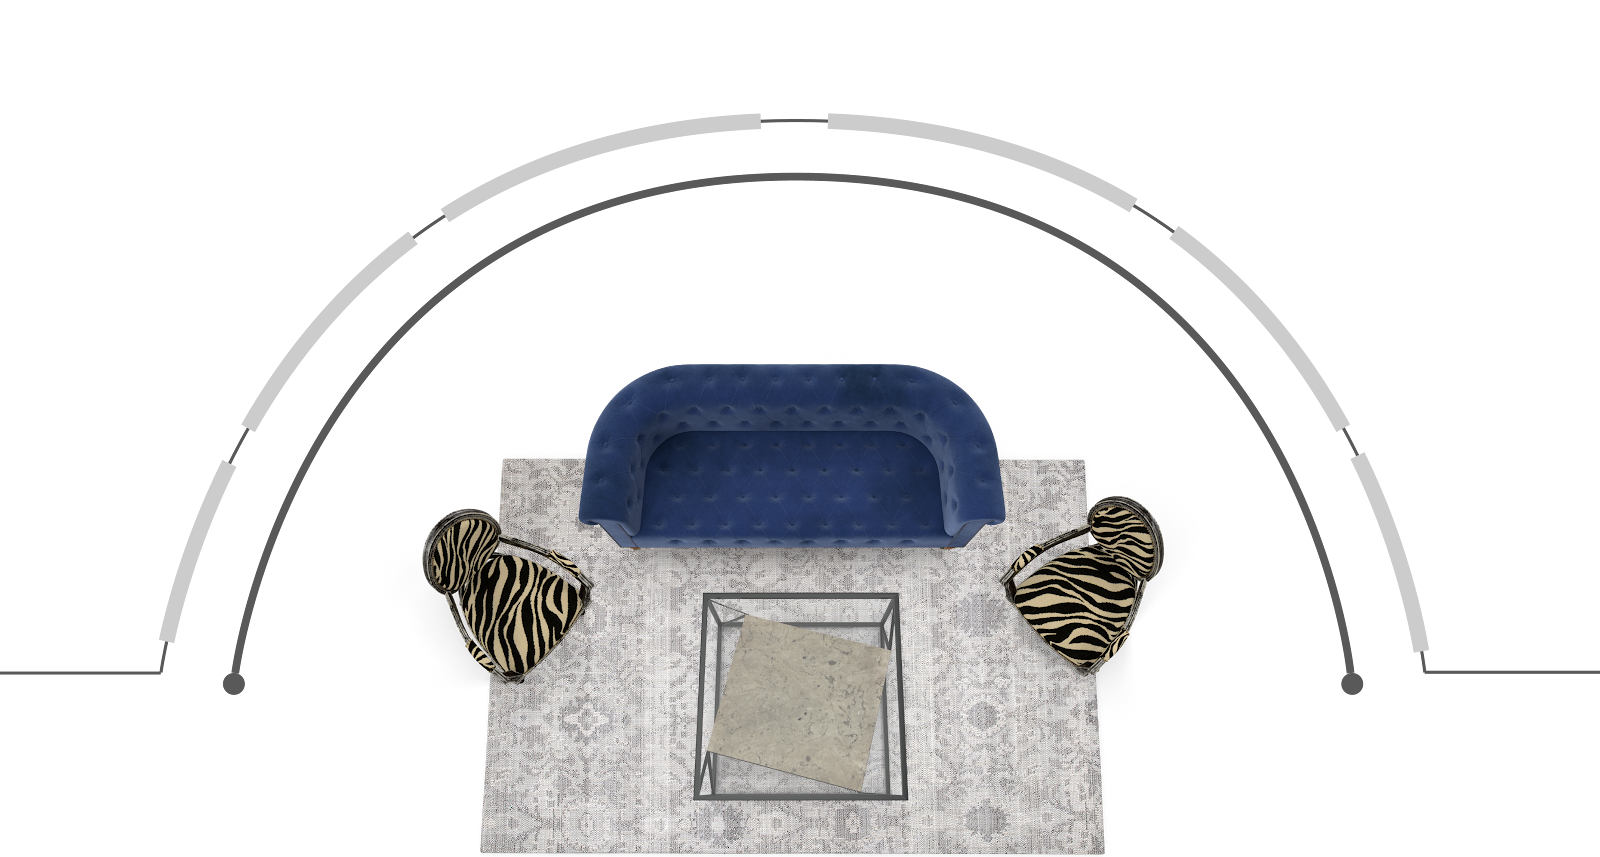
Concave
The most common bowed window type, a Concave Rod bends with the window, away from the room. In general, they are used with bays of 5+ windows and come in a smooth, continuous piece. They could be used in smaller settings but keep in mind that the tighter the angle, the tighter the curve or larger the gap between the rod and corner. If you want a bent and/or segmented window, see the following Bay Window section.
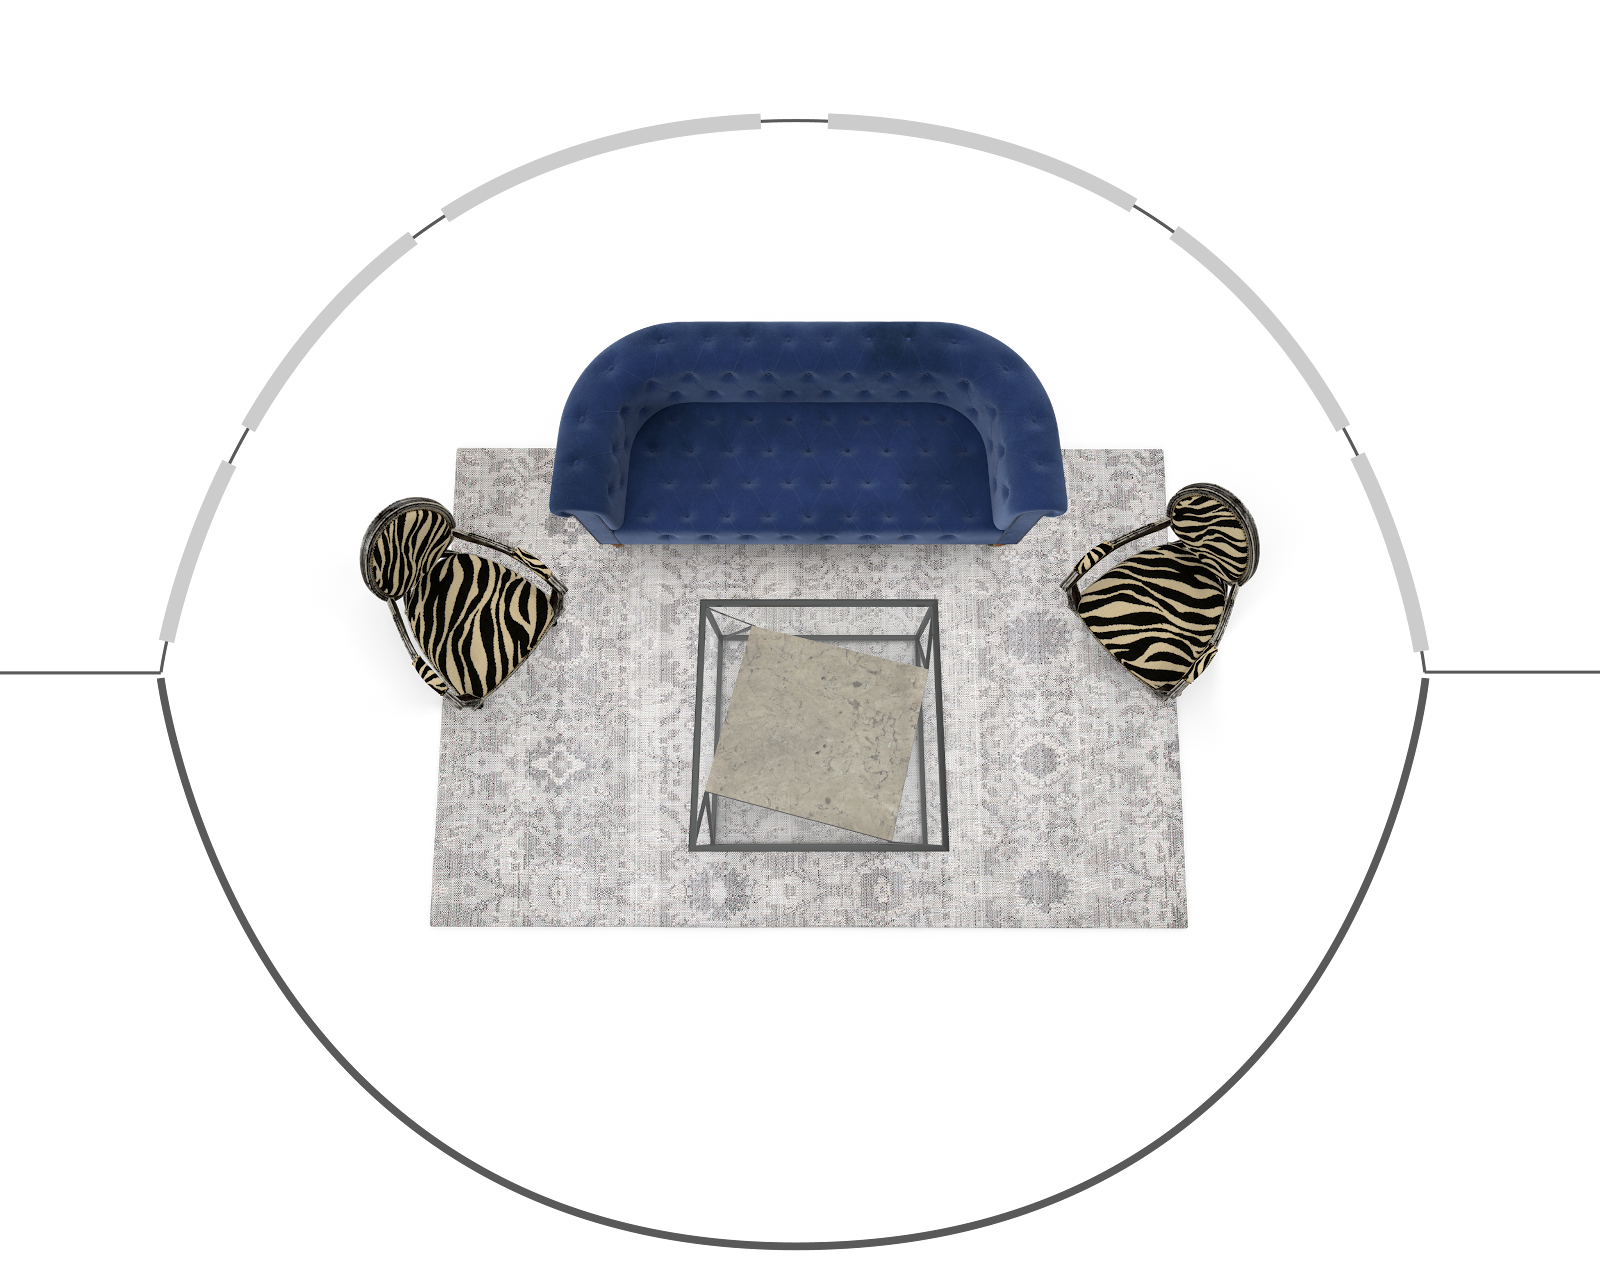
Convex
Convex Rods bend outward into the room, away from the window. It can be used to create cozy spaces that can be separated from the rest of the room by the drape. These rods will require at least one ceiling mounted center support since, regardless of their length, the inside mount brackets at each end will not support the rod alone.
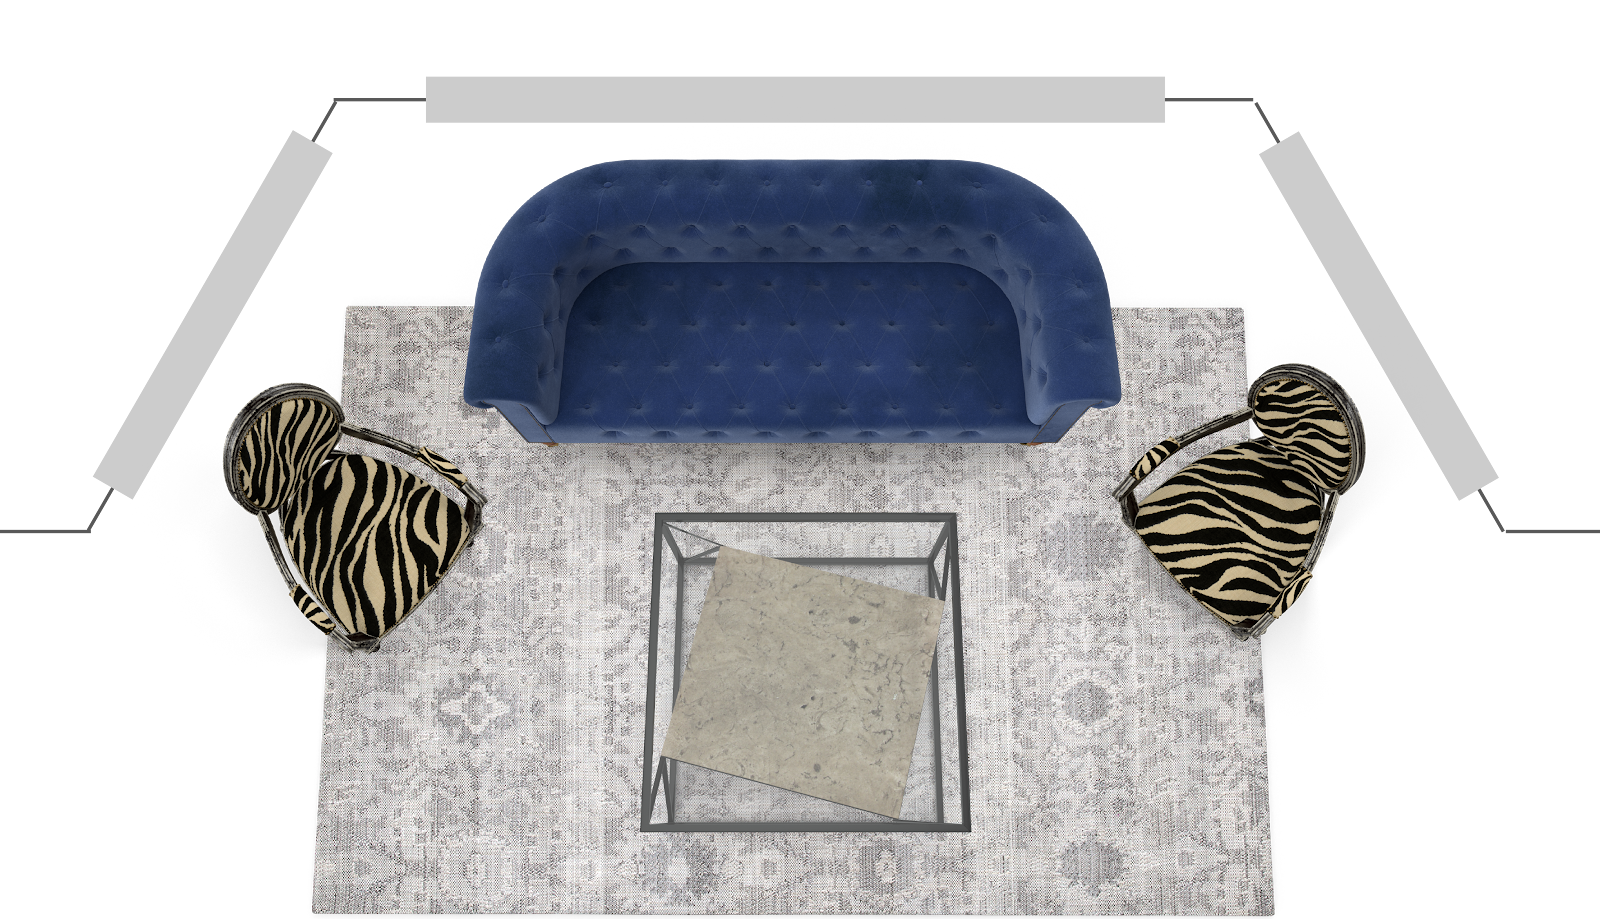
Bay Window
A Bay Window is a popular window treatment that generally consists of 3 to 4 rods connected via bends or elbows. It creates an angled and segmented rod that fits closely to the window.

As seen here, there are different window configurations that consist of 2 to 5 windows. The 2 window (or triangle bay) generally doesn’t need a template unless it is part of a larger treatment. The 5 sided bay can use a Bay Window treatment or a curved rod due to the shallow angles.
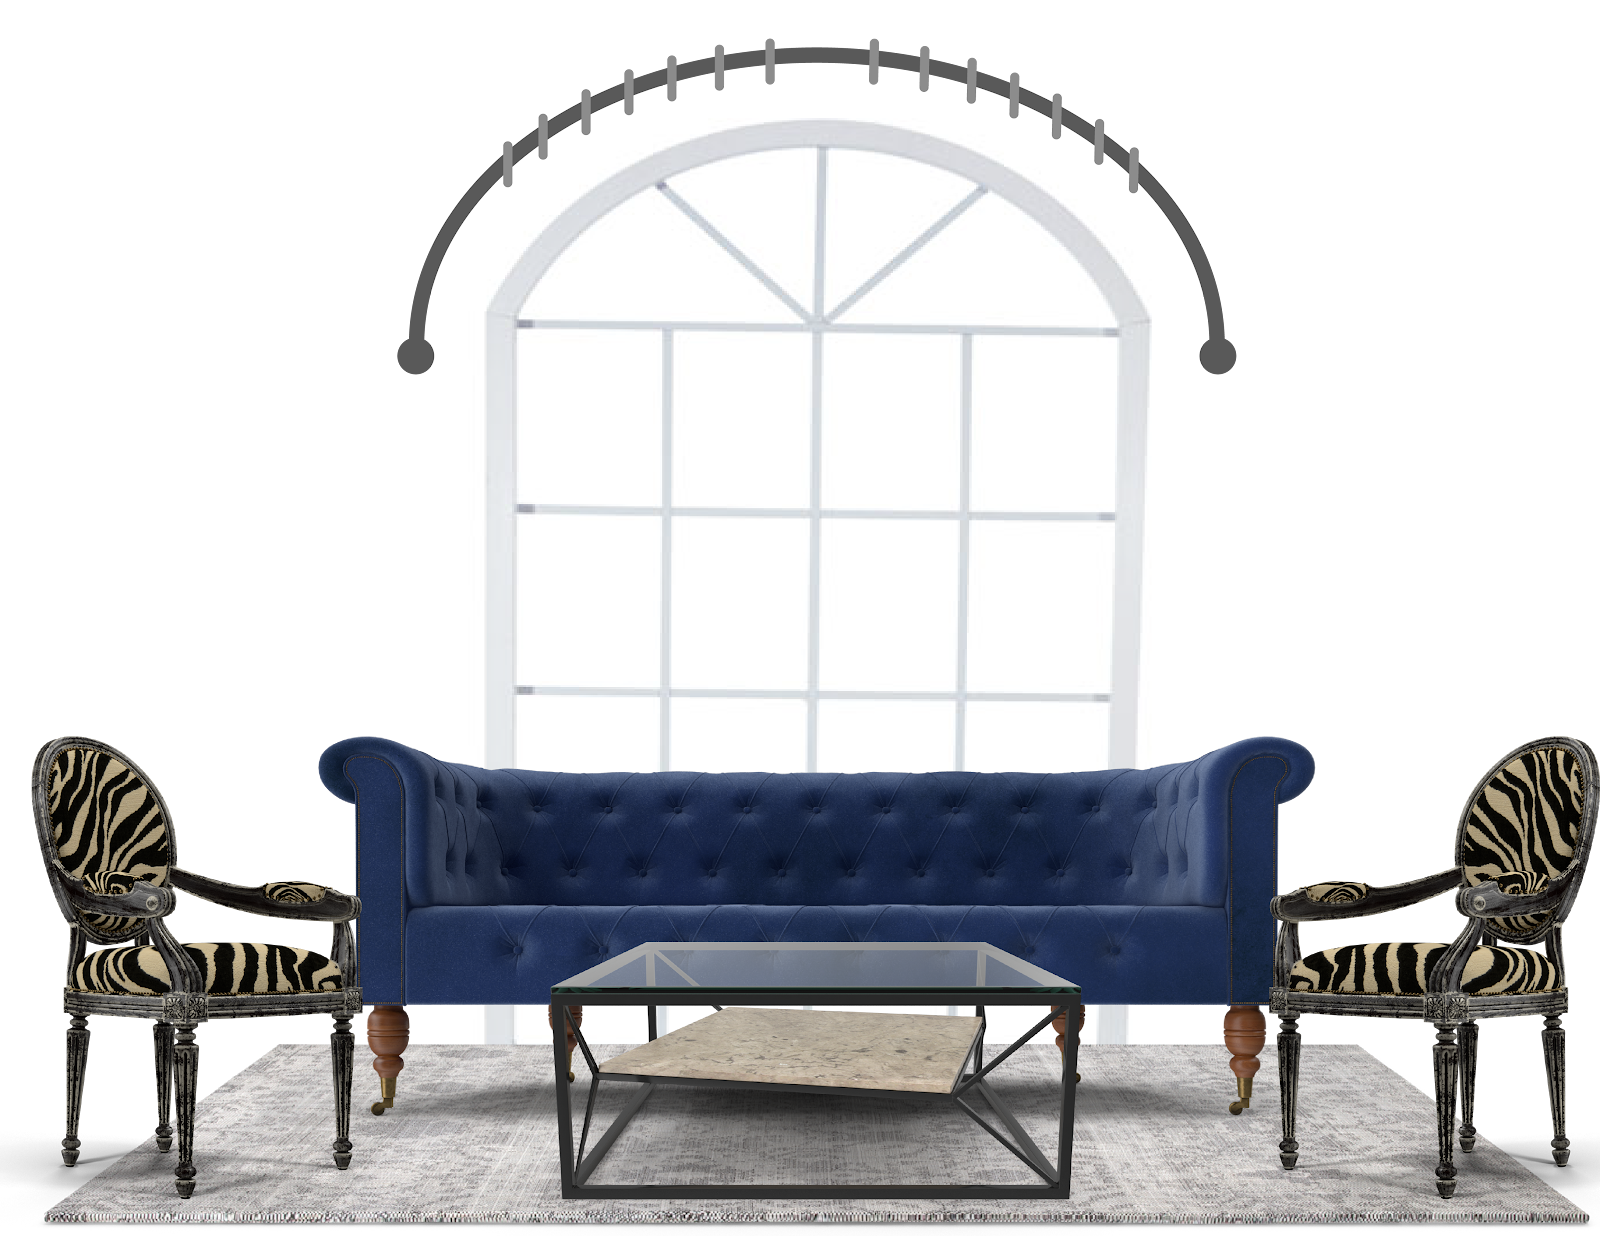
Eyelash/Arched
Eyelash, or Arched, rods are curved rods that are mounted above an arched or round window. Due to their construction, the drapery will not be functional and the rings will need to be welded in place.
SUPPLIES
Once you have figured out what kind of window you want, you will need to gather your template supplies. We have gone into more detail in our ‘Make a Window Treatment Measuring Kit’ blog, but here are the essentials
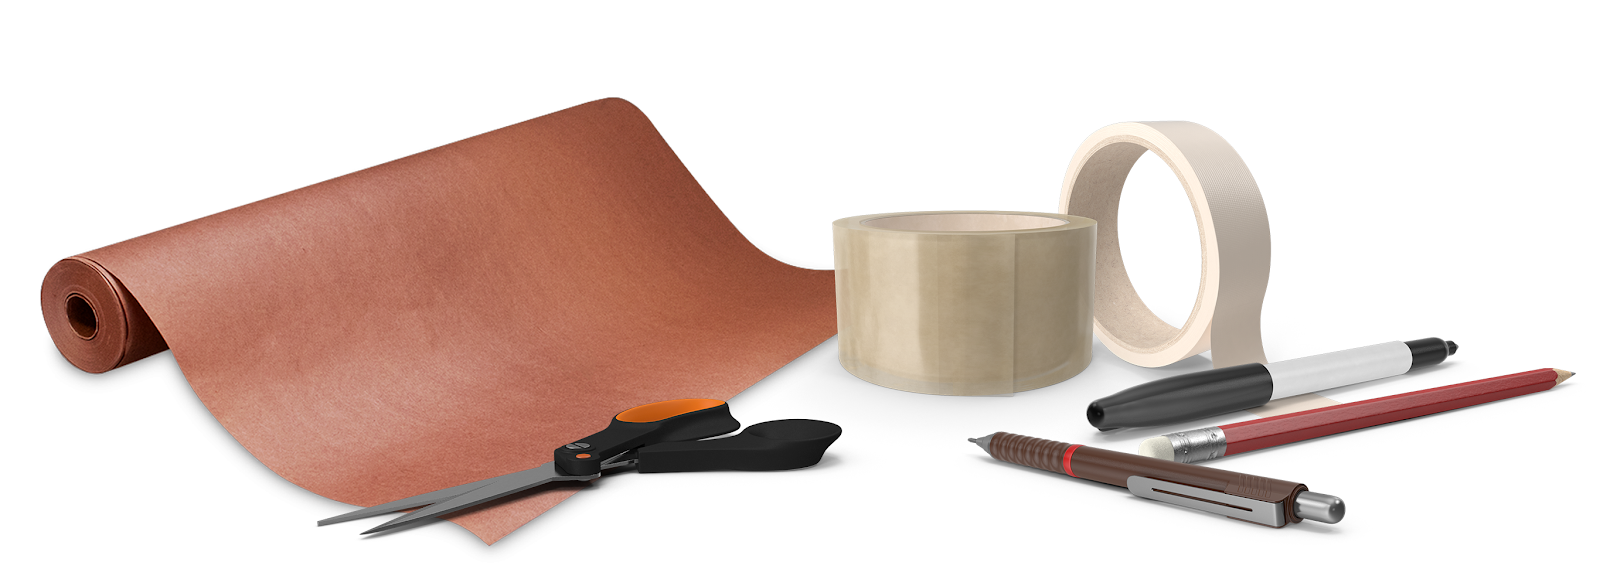
- Heavy craft or packing (Butcher) paper
at least 20” wide. - Packing Tape
- Masking or Painters Tape
- Marker with dark Ink and thick nib
- Pencil
- Scissors
You will likely notice that there are 2 types of tape shown. This is due to their adhesive strength and use. Packing tape is clear and has strong adhesive, making it perfect for attaching the pieces of paper together (especially for large templates) and, of course, to secure the shipping roll. Masking or Painters tape is opaque and has a weak adhesive, making it more useful to mark important sections (such as rings, end of rod, and splice points) as well as to keep the template rolled when packaging, since it can be removed without ripping the paper.
All important notes, such as the company info and important sections, should be written clearly in thick, dark marker. A Sharpie works best but any dark marker should do. Avoid pens and highlighters as they are not thick or dark enough. The pencil should only be used to mark the curve of the window or other non-permanent notes.
Please use a thick and sturdy paper like butcher or craft paper, with a width of 20+ inches. Thinner paper will rip easily and is often not wide enough. Sometimes people use sheets of fabric or plastic, and while these are sturdy options, they often make measuring difficult and could result in inaccuracies.
| Helpful Helser Hint If you are having trouble finding the right kind of paper or only need a small amount, we can help! Click on the button below to order cut-to-order sheets of 36″ wide Butcher Paper. We will send it to you in a shipping tube to maintain its shape. All you have to pay is shipping & handling, so wait for our call to tell you the weight and cost after ordering online! |
STEP BY STEP INSTRUCTIONS
The following steps are intended for use with Convex, Concave, and Bay windows. See below for the Arched Window instructions.
STEP 1
Cut strips of paper (minimum 20” deep) and use packing tape to tape the pieces securely together into a piece large enough to cover (or fill) the area.
STEP 2
Lay paper into the bowed area and use masking tape to hold the paper in place along the straight edge of the bow. Starting in the center, smooth and crease the paper along the base of the wall.
STEP 3
Use the pencil to define the crease so you can cut the curve out along the line.
STEP 4
Cut the template out and let it fall back into the bowed area to check the accuracy of the template. Make any corrections.
STEP 5
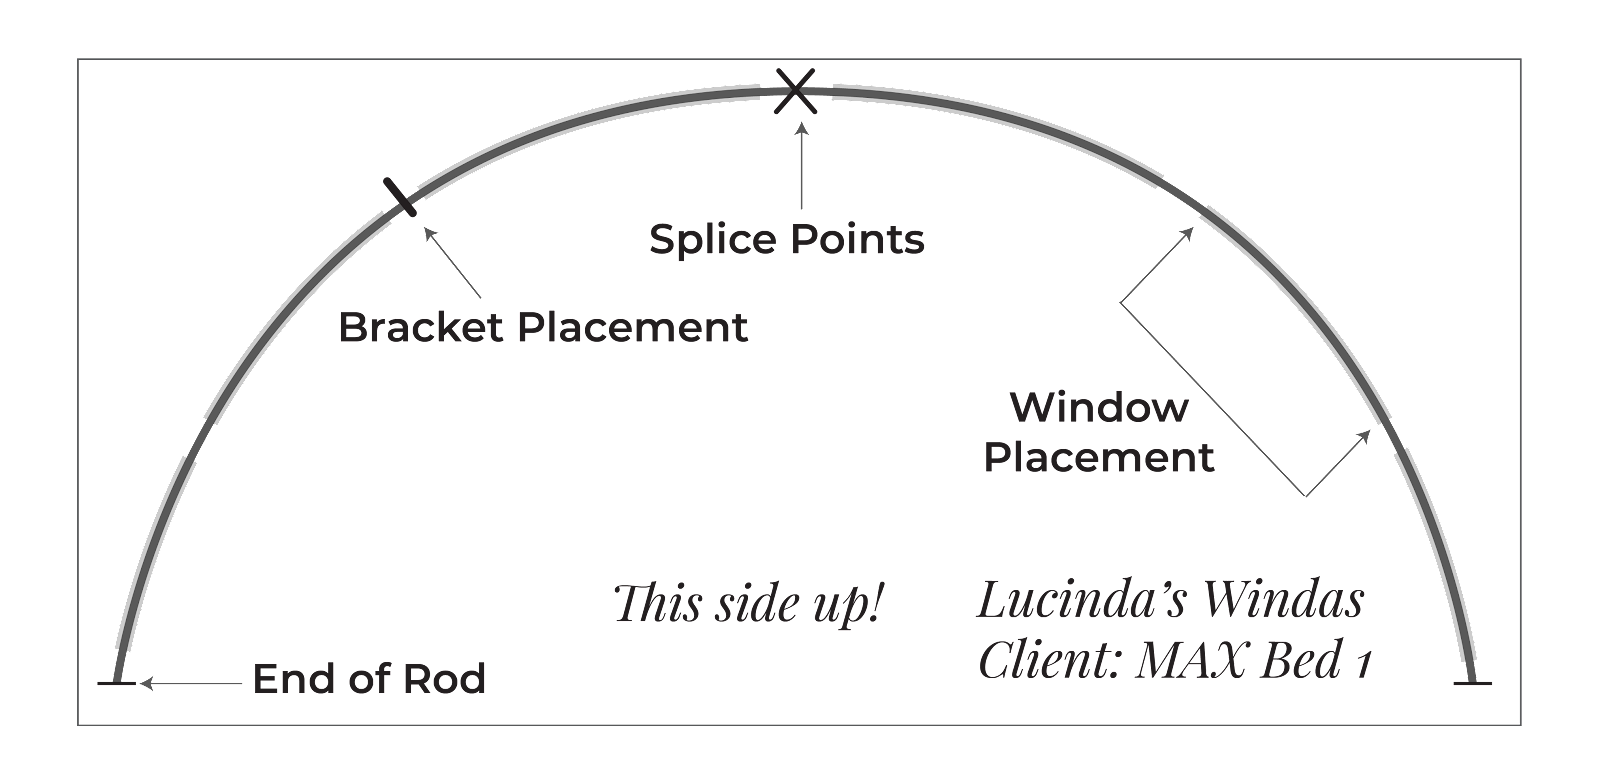
Using a marker, write the following information on your template: your company name, purchase order, and the sidemark of your order. If multiple rooms are being ordered, specify the room on each template. Also, write which side is up.
STEP 6
Fill out the Custom Rod Order Form to send in with your order and template. Make sure to fill all the fields possible.
STEP 7
You MUST mark on the template where the ends of the rod are to be. If you want rings welded to your rod, you MUST mark the location of each ring. Failure to do so will result in the template being returned for revision.
BAY WINDOW NOTES:
If you do not want to make a template for a Bay Window, it is possible to do one using just the measurements of the various parts of the window and the angles. Use the Bay Window Measurement Sheet and Bay Window Calculation Sheet (Available in 3 Pane and 4 Pane versions) to take the needed measurements. However, depending on the complexity of the bay window and the calculations, doing a template is often the easiest choice.
ARCHED WINDOW INSTRUCTIONS
Arched Window templates are created in much the same way, with some notable differences. Before you start, determine if you are placing the rod above the window or inside of it (AKA Inside Mount). This will affect how you make the template.


STEP 1
Use masking tape to adhere the craft/butcher paper to the wall, around the area to be templated.
STEP 2
Use a pencil to trace the edge of the arch.
For Inside Mounts, you can skip step #3 by cutting out the arch with a wallpaper knife while the paper is still hung on the wall.
STEP 3
For Inside Mounts, leave the paper whole or cut out around the arch, leaving room for the drawing of the rod.
For Outside Mounts, cut out the arch if it was not cut out during step #2.
STEP 4
For Inside Mounts, push the cut template into the opening and trim or adjust until fit is exactly what you want. Be aware that the normal deduction for inside mount is 1/8”. If you do not want this deducted you must say so.
For Outside Mounts, draw the rod above the penciled archway, being sure to place it where you want the final rod to be placed. You will want to measure the distance between the rod and window as you will need this measurement while filling out the Custom Rod Order Form.
STEP 5
Using a marker, write the following information on your template: your company name, purchase order, and the sidemark of your order. If multiple rooms are being ordered, specify the room on each template. Also write which side is up.
STEP 6
Fill out the Custom Rod Order Form to send in with your General Order Form and template. Make sure to fill all the fields possible.
STEP 7
You MUST mark on the template where the ends of the rod are to be. If you want rings welded to your rod, you MUST mark the location of each ring. Failure to do so will result in the template being returned for revision.
| Helpful Helser Hint When creating your template and filling out your Custom Rod Order Form, ask yourself the following questions:  Is there a baseboard at the spot you are making your template? If so, how thick is it (D)? The rod will actually hang on the wall behind the baseboard so the depth of the wood does make a difference in your clearance and return dimensions.  What clearance (C) do you want for your treatment? As the diagram on the left illustrates, the finished length of your rod will differ slightly from the wall measurement. This is because of the deduction that must be taken to allow for the clearance. |
FINAL STEPS
Once your template is made, please do the following:
STEP 1
Download the Custom Rod Order Form and General Order Form. Both forms have been formatted to be fillable on a computer, so either fill each of them out and print them off or fill them out after printing. We recommend filling them out before printing as handwritten instructions can be difficult to read and errors can occur.
STEP 2
Roll up the template and secure the ends and sides with Masking Tape. As stated above, do not use packing tape for this step as the template is likely to rip during unpacking.
STEP 3
Put both of the order forms and the template into a shipping tube. Any other form of shipping will result in the template being folded and the resulting creases can cause issues during measuring.
STEP 4
Ship the template to Helser Brothers at the following address:
| ATTN: Ordering Department Helser Brothers, Inc. 3294 North Nevada Street Chandler, AZ 85525 |
Once the template arrives, one of our CRAs will measure the template and create an order or quote. The template will also be used during production by our Fabrication team to determine the accuracy of the measurements and to make sure that the resulting rod fits properly.
|
IMPORTANT NOTE: If this is not possible and a CRA has to recreate/correct the template, you will be charged an additional $25 per hour (with a minimum of $25 if under an hour) on your final invoice. You will also be required to waive Helser Brothers’ responsibility for inaccuracies. |