
Here are 9 steps on how to measure windows for draperies.
We have covered how to plan for drapery panels and how to build a measuring tool kit in prior posts. You may want to review them before you actually measure your windows for drapery panels.
If you are not using a specific form, sketch a window layout of the total area area to be covered. Include the side walls, ceiling and floor. For our purposes, the three windows shown in our image below will be treated with floor length draperies.
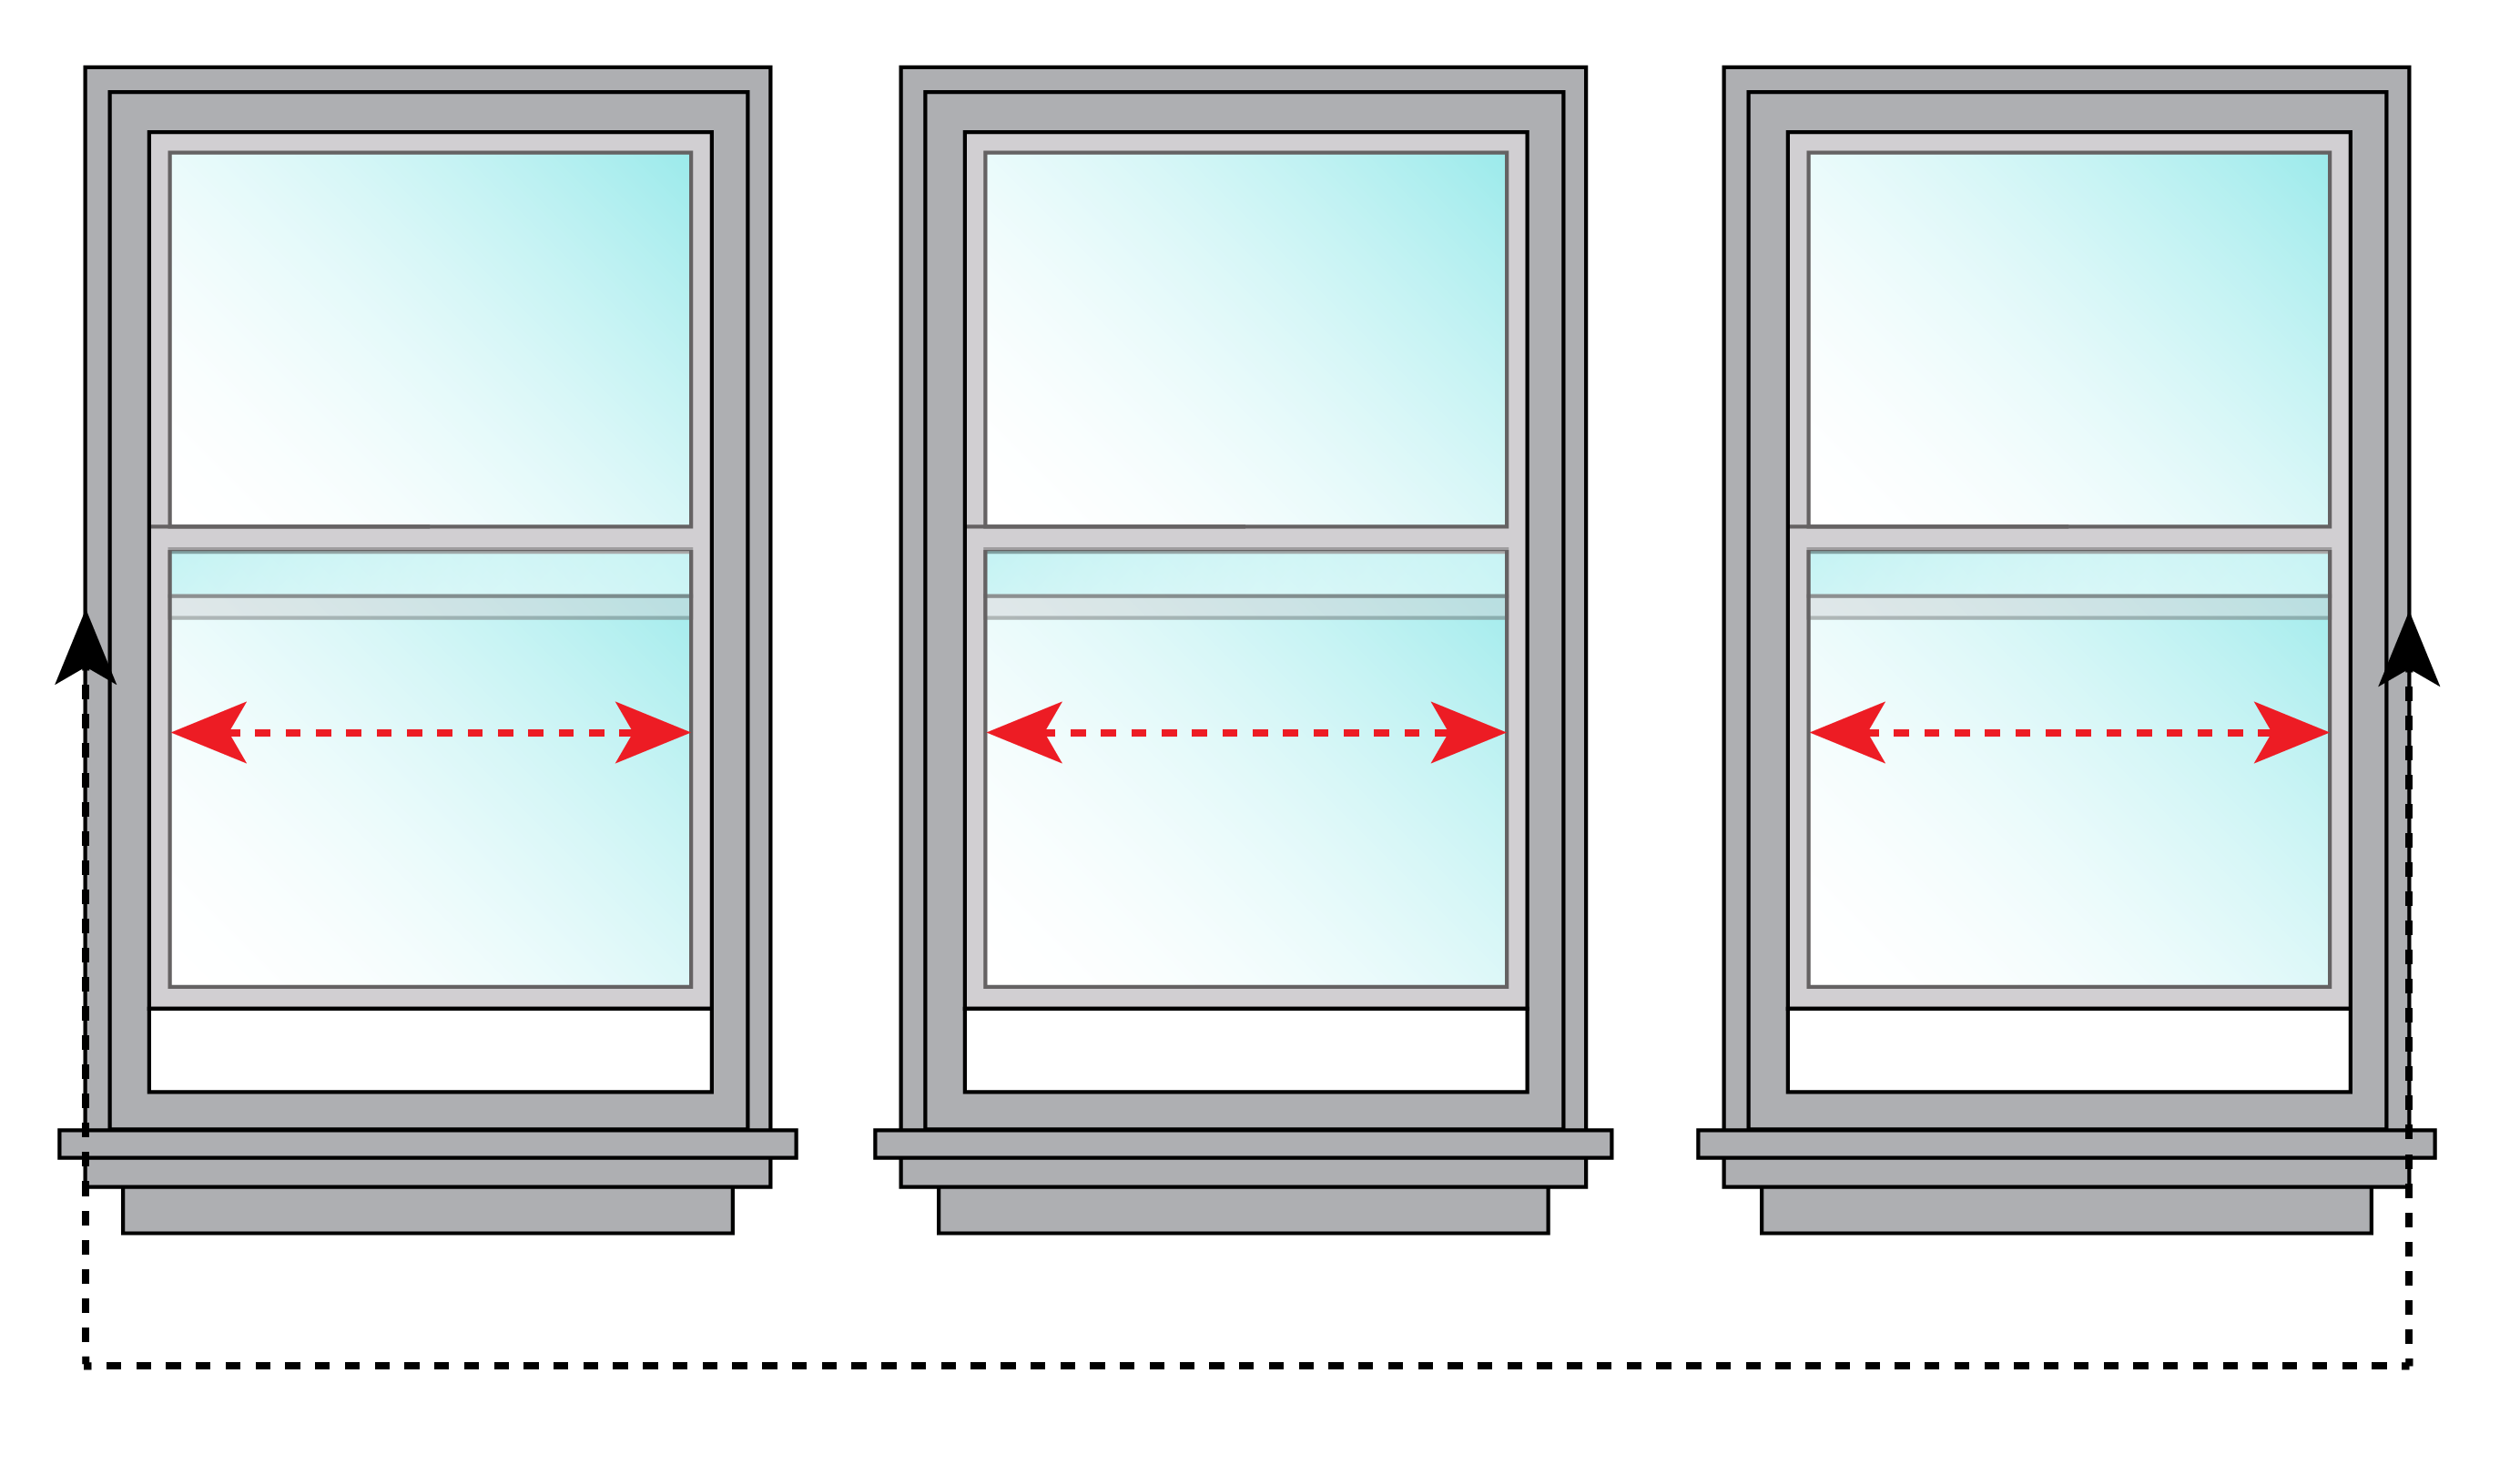
STEP 1: Measuring left to right, measure the dimension that includes all three windows from the outside of the trim on the left to the outside of the trim on the right (Shown in black on Figure 1 & 2).

If there is no trim, just measure from the edge of the openings.
STEP 2: Then measure from the left side of the glass to the right side of the glass (Shown in red on Figure 1 & 2).
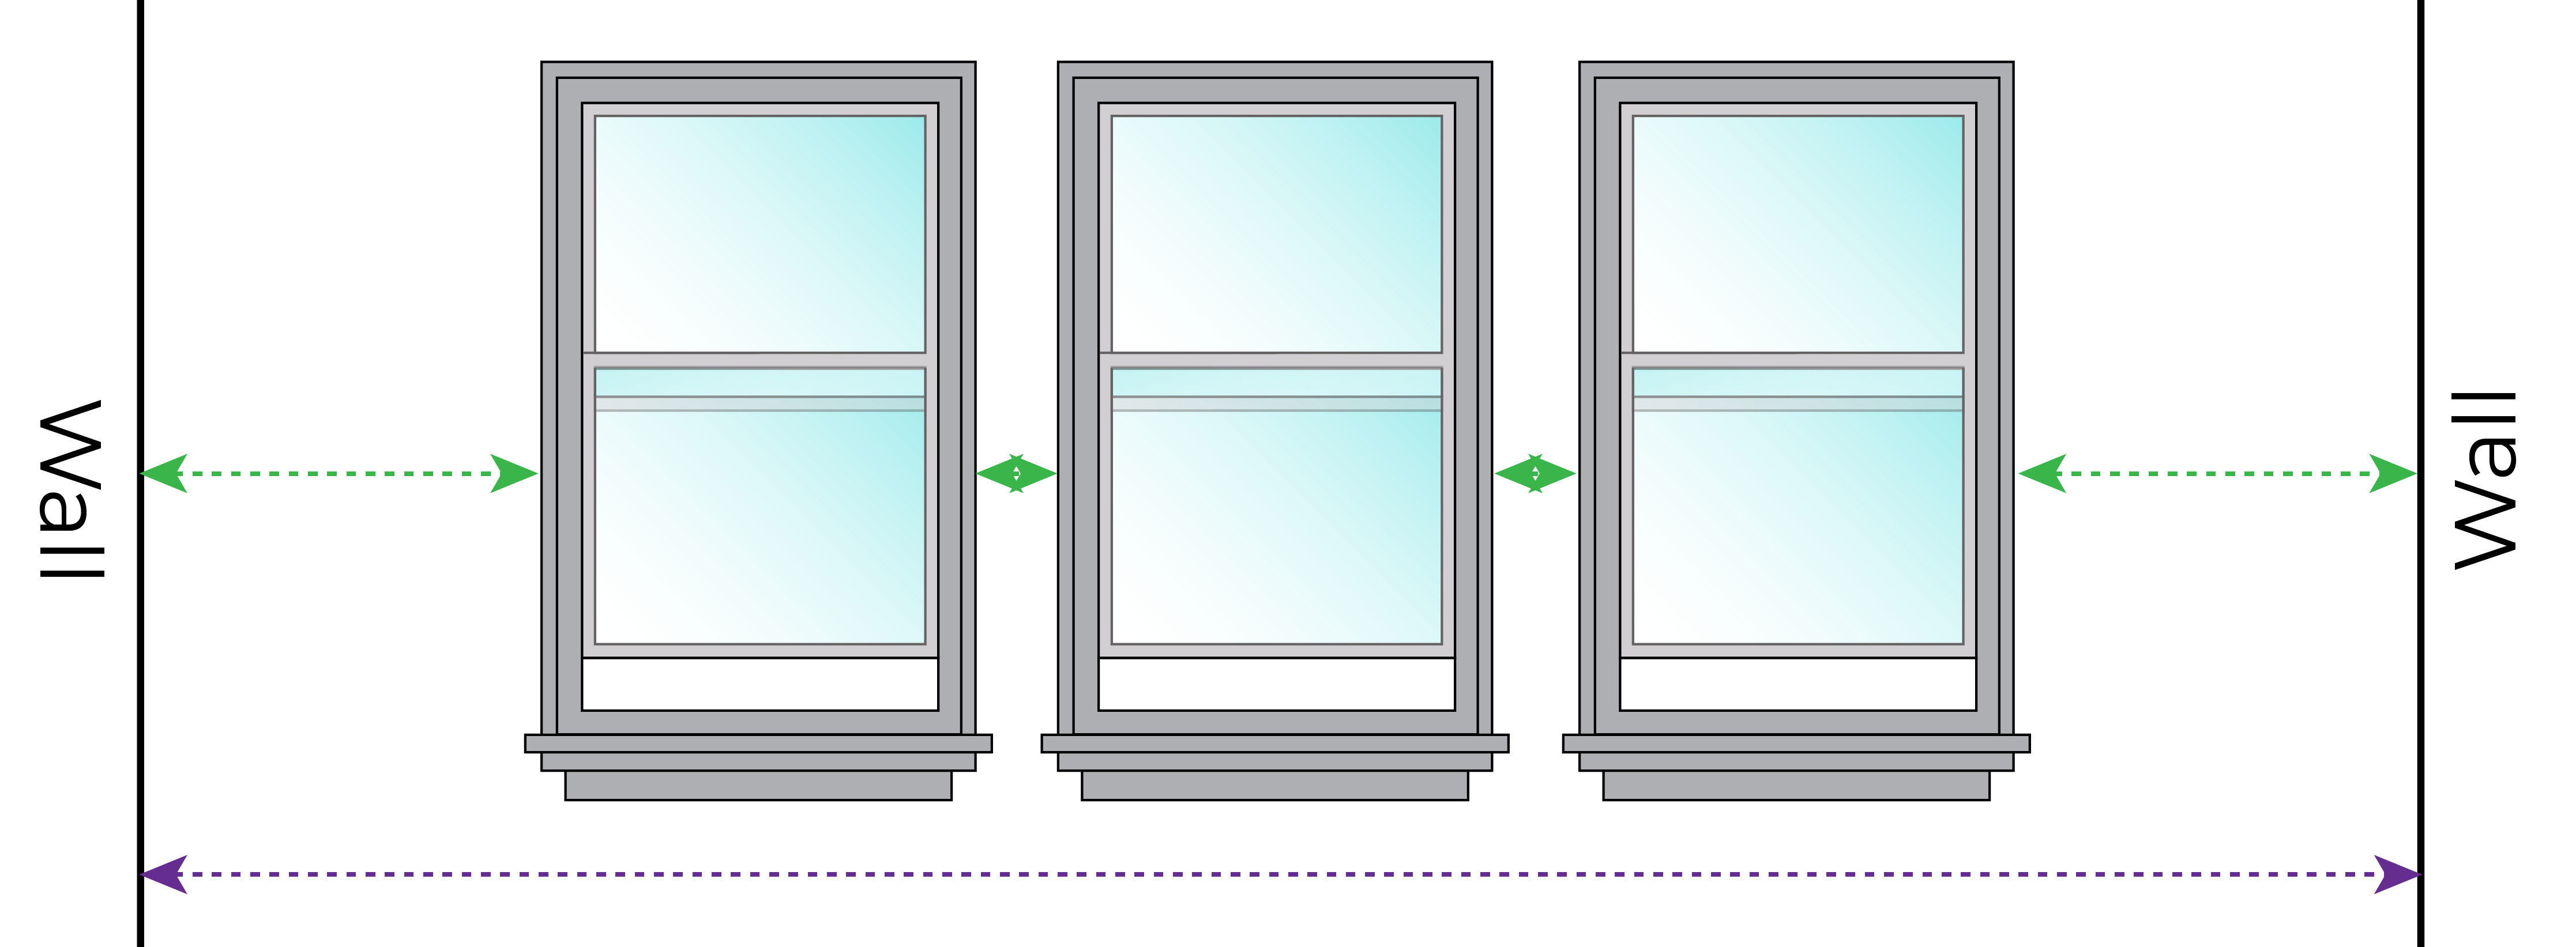
STEP 3: From left to right, measure the distance from the trim to the wall on either side and the distance between each window (Shown in green on Figure 3).
STEP 4: Measure the distance from wall to wall (Shown in purple on Figure 3).
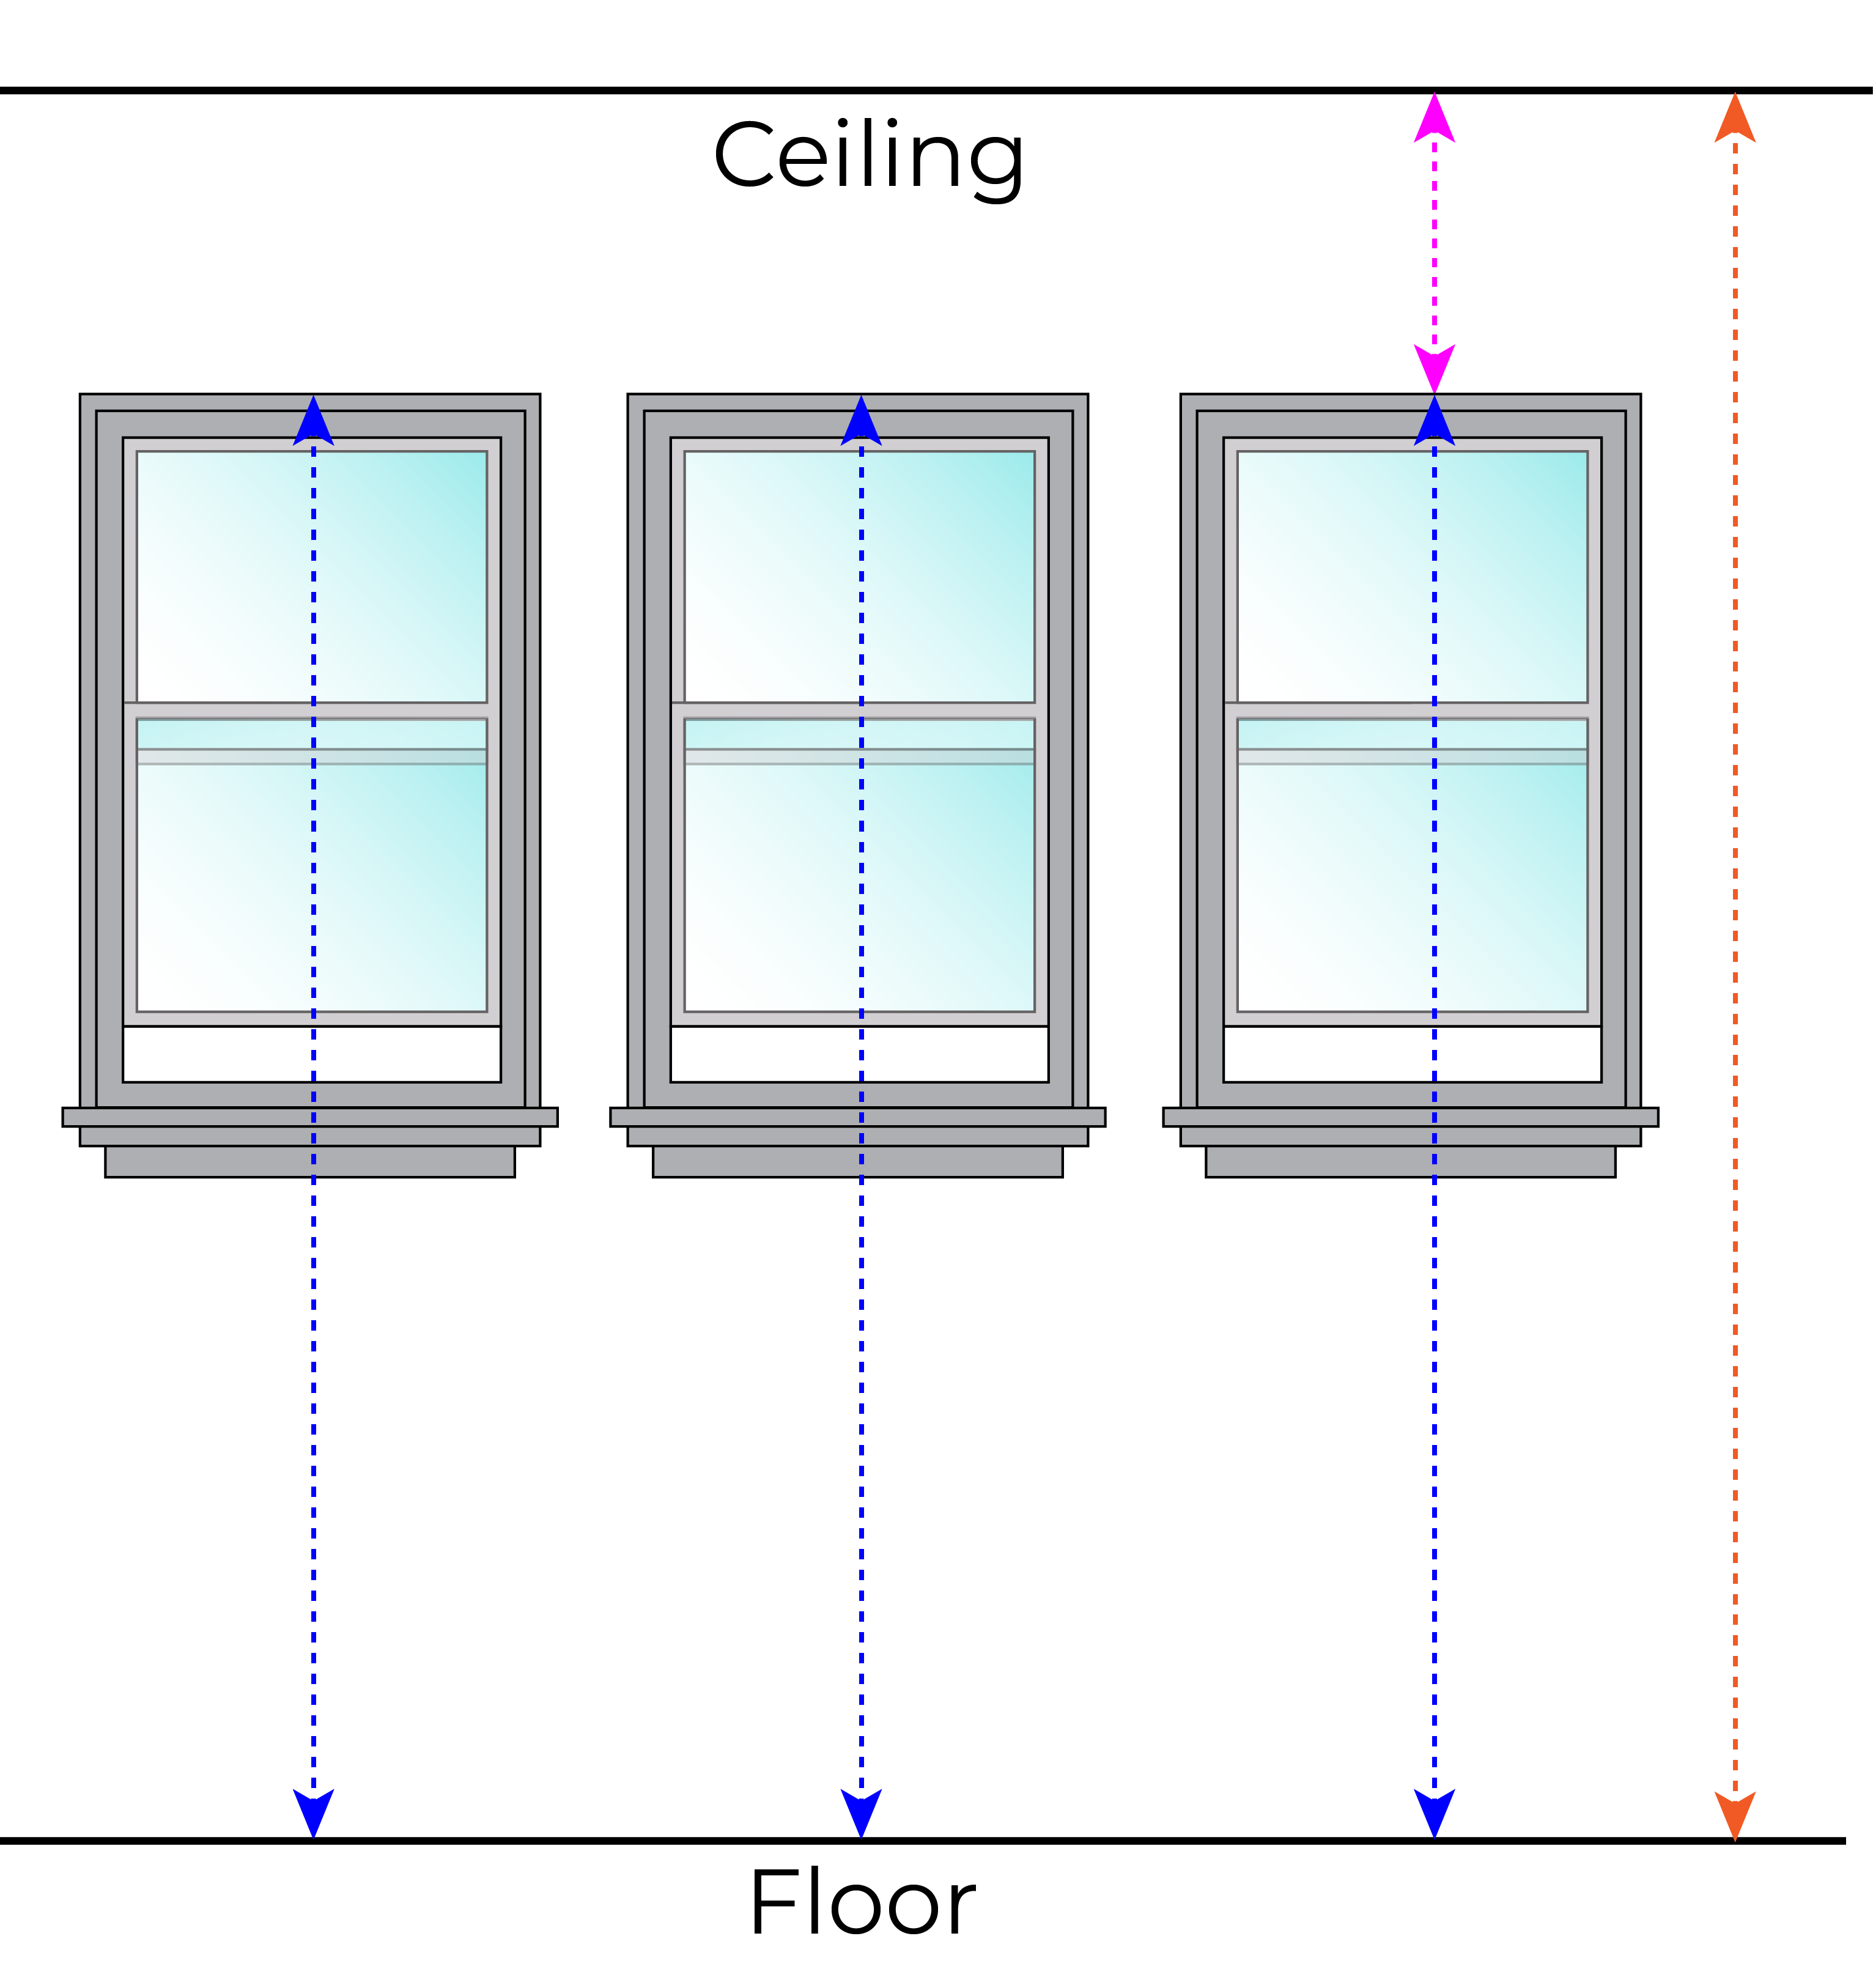
STEP 5: Measure from the top of each window to the floor. Measure all three widows (Shown in blue on Figure 4). This dimension can vary from window to window.
STEP 6: Measure from the ceiling to the top of the window (Shown in pink on Figure 4).
STEP 7: Measure from the ceiling to the floor (Shown in orange on Figure 4).
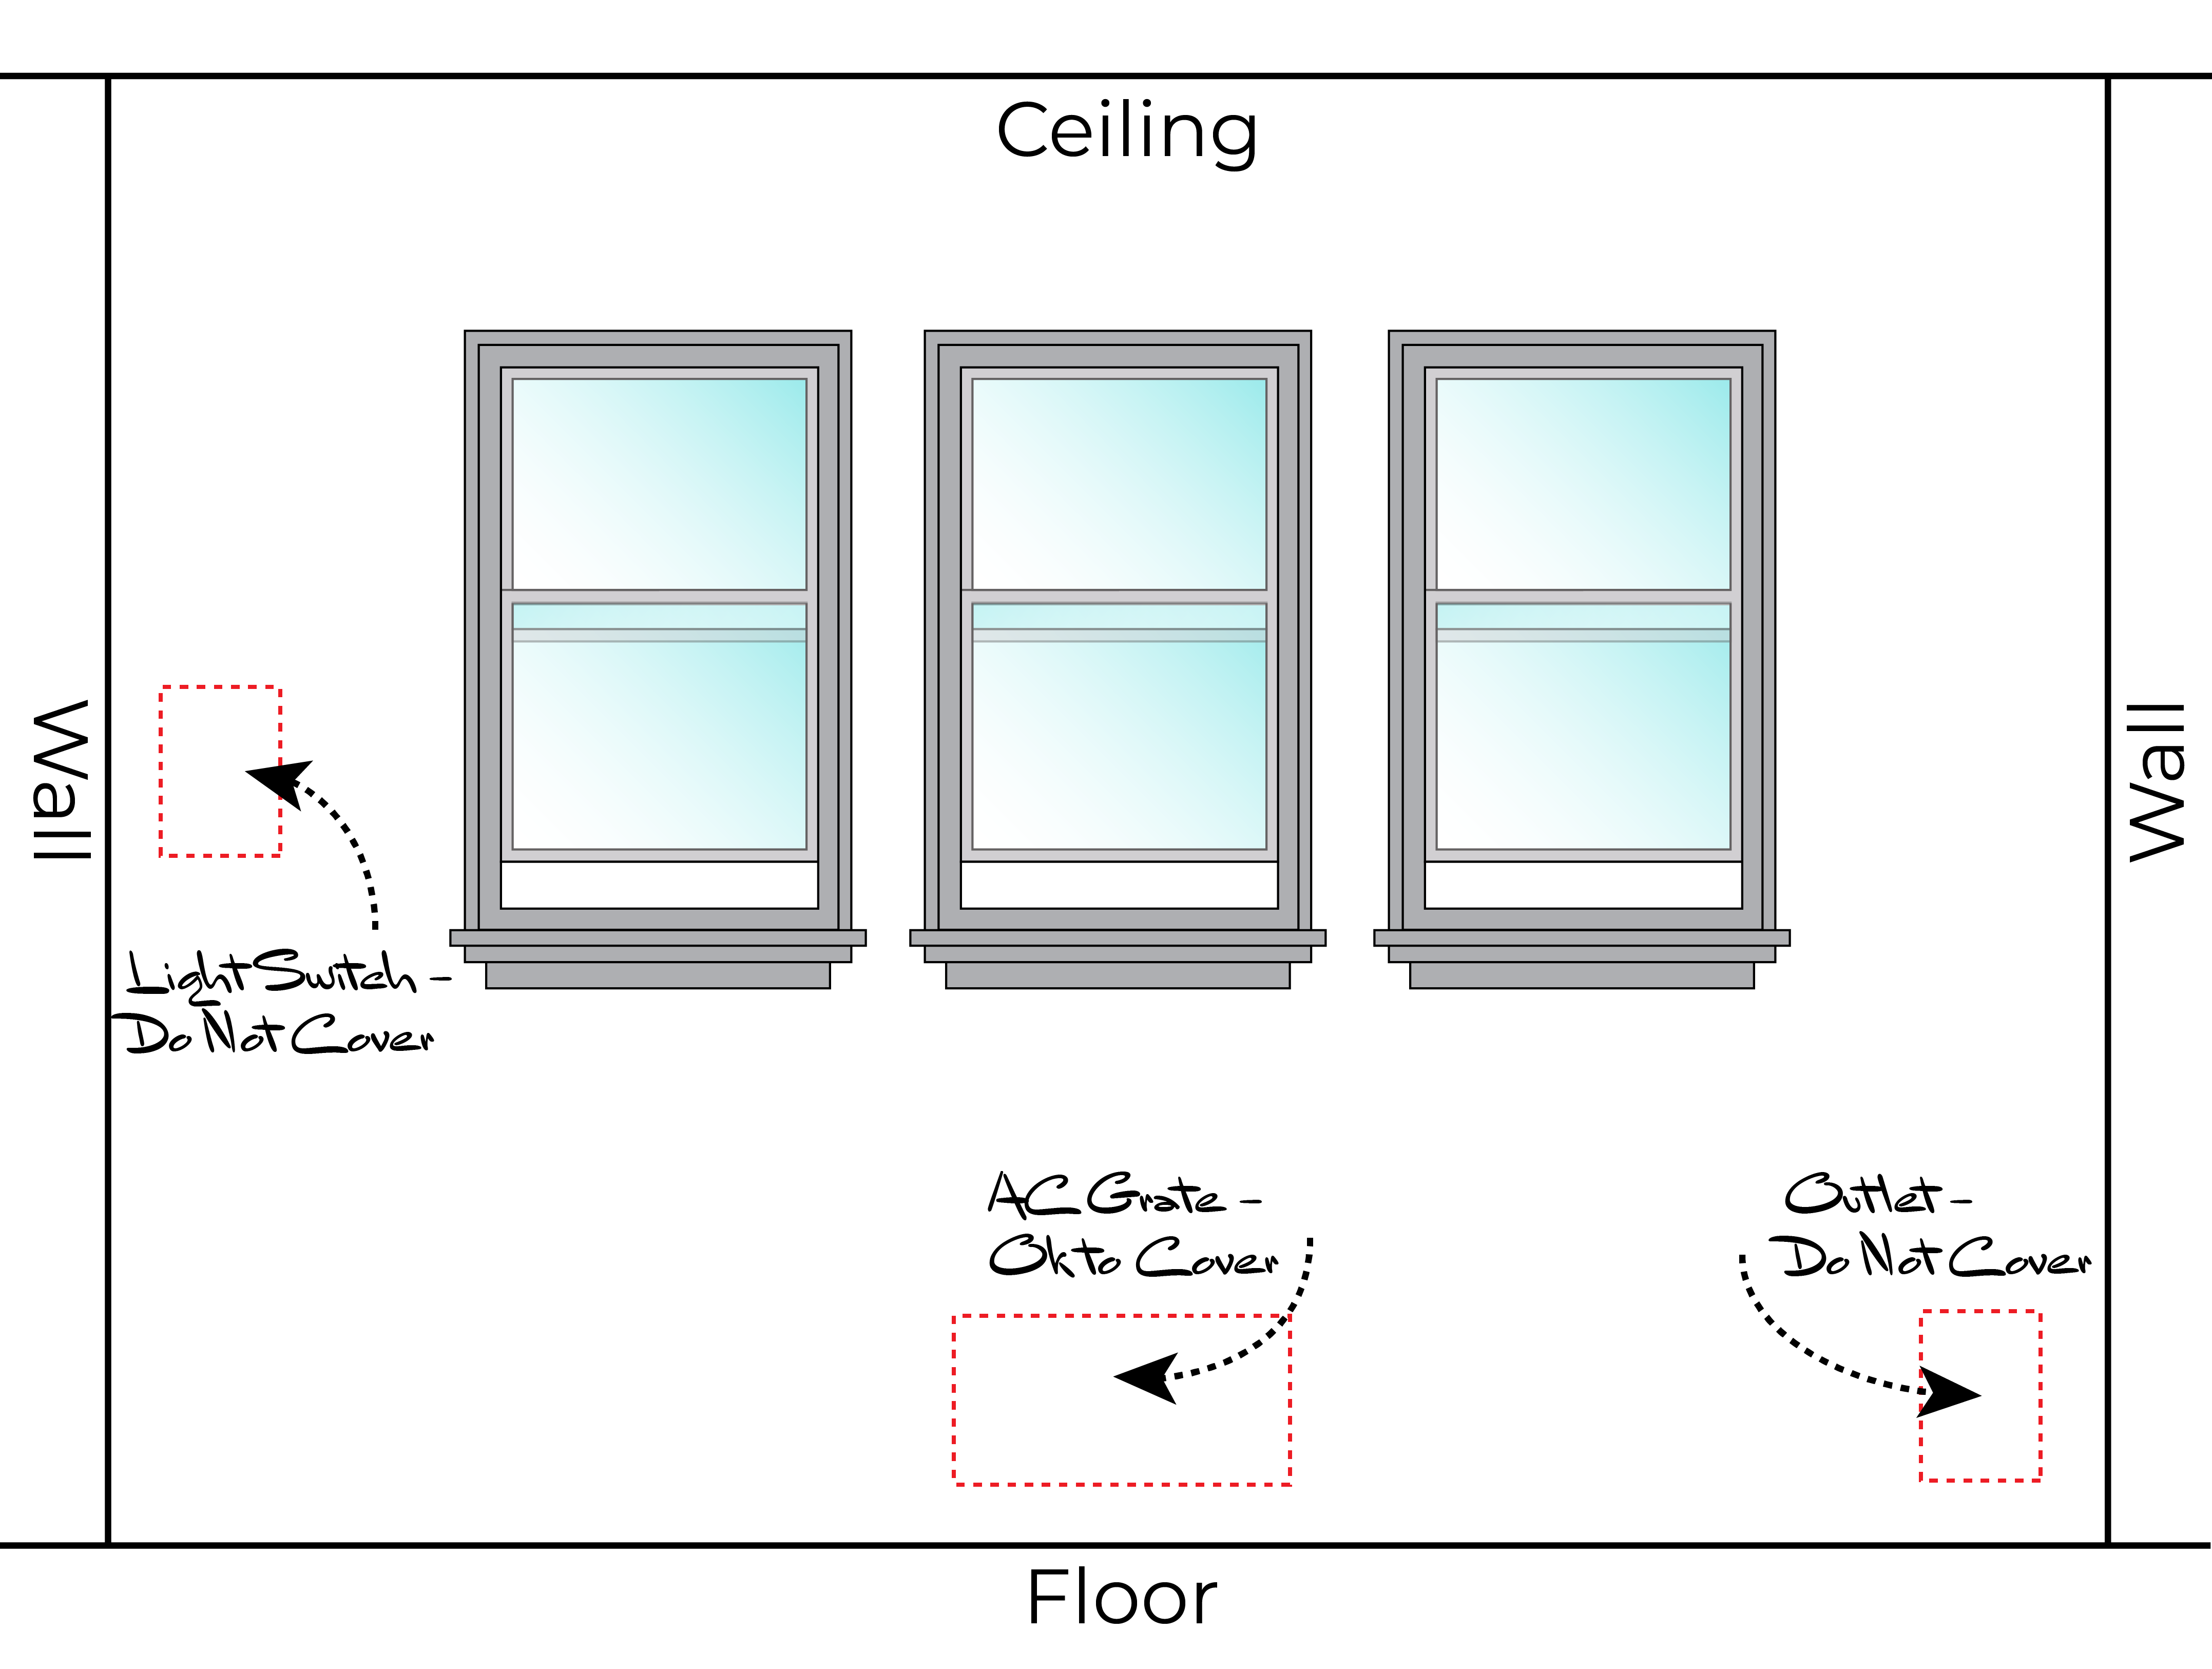
STEP 8: Note any electrical outlets, wall switches, and art work. Determine whether or not the wall switches and artwork need to be uncovered. See Figure 5 for an example.
STEP 9: Take pictures of any obstructions or problems you see. These will be critical to planning your draperies when you get back in your office.
Now you can begin to plan your panels. In fact, for the example shown, you could consider a one way panel if it works better for your design.